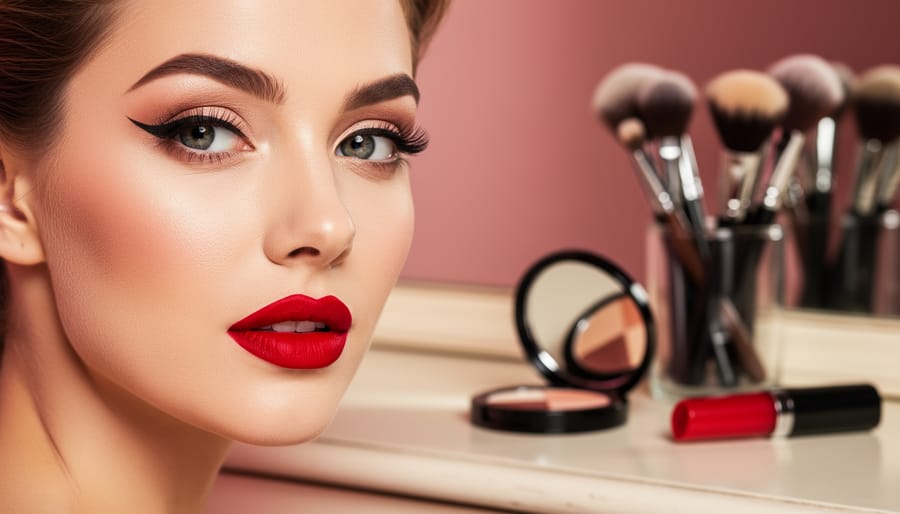
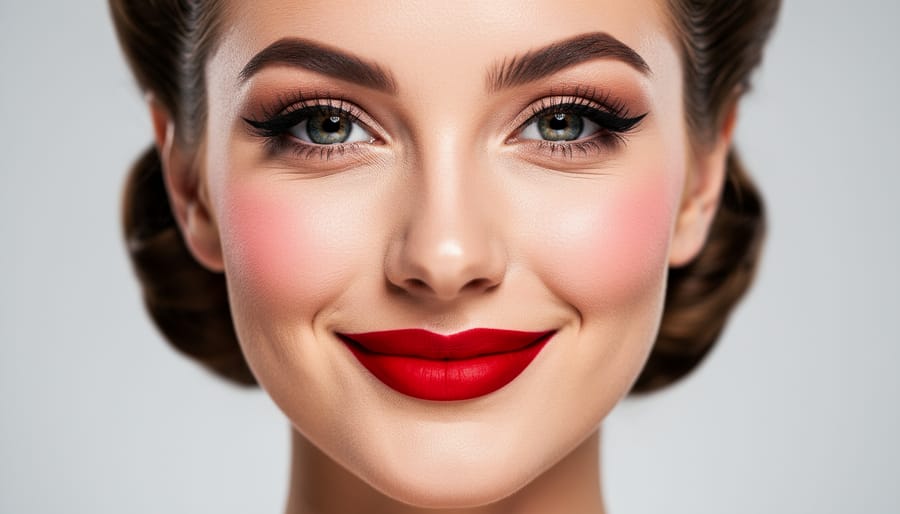
Pinup makeup transforms you into a vintage bombshell with just five essential techniques: winged eyeliner, defined brows, flawless matte skin, rosy cheeks, and a bold red lip. The entire look takes about 30 minutes once you’ve practiced the signature cat-eye flick, and works beautifully whether you’re channeling Betty Grable’s girl-next-door charm or Bettie Page’s sultry confidence.
This iconic style emerged when women needed confidence and glamour during wartime uncertainty, creating looks that were both polished and practical. Modern pinup enthusiasts have kept these classic techniques alive while adapting them to celebrate every face shape, skin tone, and personal style. The beauty of this makeup approach lies in its democratic appeal: unlike today’s trend-driven looks that shift with each season, pinup makeup offers timeless elegance that flatters everyone.
What makes pinup makeup particularly special is how it enhances your natural features rather than hiding them. The structured application creates dimension and drama without requiring expensive products or professional training. You’ll learn to work with what you have, building confidence through each precise brushstroke. This guide walks you through every product you need, safety considerations for sensitive skin, and the exact steps that professional vintage enthusiasts use to achieve that picture-perfect 1950s glamour.
What You’ll Need: Essential Products and Tools
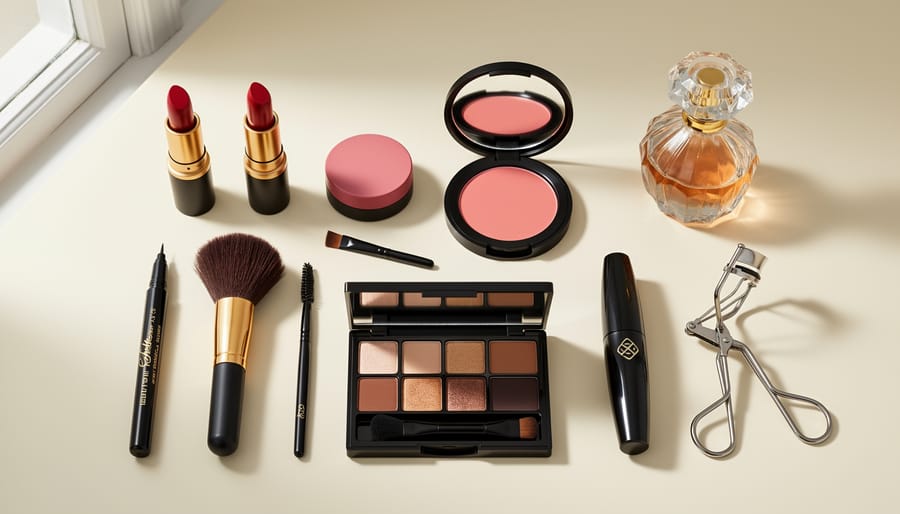
Creating authentic pinup makeup doesn’t require a professional kit, just a handful of key products that work beautifully across all skin tones and face shapes. The secret lies in choosing quality essentials that help you build dimension, drama, and that unmistakable vintage glamour.
Here’s what belongs in your pinup makeup collection:
- Foundation that matches your skin tone perfectly, plus a beauty sponge or brush for smooth application
- Translucent or tinted setting powder to lock your base in place and create that signature matte finish
- Cream or powder blush in rosy pink or warm peach shades
- Liquid or gel eyeliner in jet black, the sharper the tip, the easier your winged liner becomes
- Volumizing mascara and an eyelash curler to open up your eyes
- Neutral eyeshadow palette with matte browns and taupes for subtle depth
- Lip liner in a shade that complements your chosen lipstick
- Classic pinup lipstick in red, deep pink, or berry
- Angled brush for brows, fluffy blending brush for eyeshadow, and precise lip brush for definition
- Optional but helpful: false lashes, brow pomade or pencil, and makeup setting spray
Don’t let the list intimidate you. Many pinup enthusiasts start with drugstore finds and gradually invest in their favorites. The most important factor isn’t the price tag, it’s choosing products that make you feel confident and work with your unique features. Whether your complexion is fair porcelain or rich ebony, whether your face is heart-shaped or round, these same essentials adapt beautifully to create your perfect vintage look. The pinup aesthetic has always celebrated diverse beauty, and your makeup collection should reflect your individual style while honoring those classic glamorous elements.
Before You Begin: Tips and Precautions
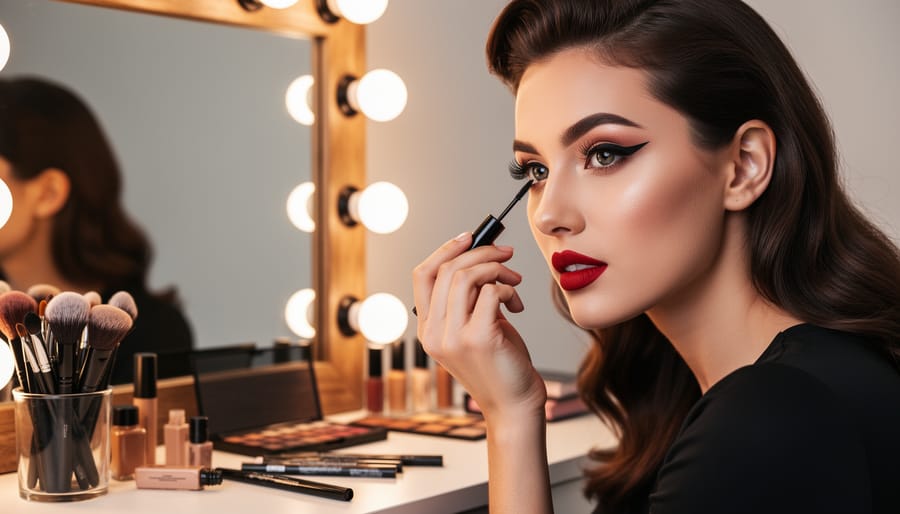
Before diving into your pinup transformation, let’s set you up for success with some practical prep work. Start with a clean, moisturized face, freshly cleansed skin gives makeup something to grip and helps everything blend smoothly. If you’re trying new products (especially foundations, primers, or bold lip colors), do a quick patch test on your inner wrist or behind your ear a day before your full application. You want to catch any potential reactions before they interrupt your glamorous moment.
Good lighting matters more than you’d think. Natural daylight near a window works beautifully, but if that’s not possible, a well-lit mirror with even lighting on both sides prevents one eye from looking perfect while the other’s a hot mess. Set aside at least 45 minutes for your first attempt, rushing through winged liner is a recipe for frustration. As you practice, you’ll get faster, but there’s no prize for speed here.
Here’s the truth: your first pinup look won’t be magazine-perfect, and that’s completely fine. Even Dita Von Teese had to start somewhere. This isn’t about recreating a vintage photograph with surgical precision, it’s about celebrating yourself and having fun with a timeless aesthetic. If your wings aren’t perfectly symmetrical or your lip line wobbles slightly, you’re still creating something beautiful. The confidence you feel matters infinitely more than flawless symmetry.
The Complete Pinup Makeup Process
Step 1: Creating Your Flawless Canvas
Start with clean, moisturized skin, hydration prevents foundation from clinging to dry patches. Apply a smoothing primer to minimize pores and create an even surface. Choose a foundation one shade lighter than your natural skin tone for that signature pinup luminosity, but don’t go so pale you look washed out. The goal is a soft, matte finish with subtle radiance.
Use a damp beauty sponge to bounce foundation onto your face, working from the center outward. This technique prevents streaks and creates an airbrushed effect. Build coverage gradually rather than applying too much at once. Don’t forget your neck to avoid that dreaded mask line.
Set everything with translucent powder, focusing on your T-zone and anywhere that tends to get shiny. A light dusting keeps your base fresh for hours without looking cakey. This smooth canvas sets you up perfectly for the dramatic eyes and lips that define pinup glamour.
Step 2: Sculpting Strong, Defined Brows
Pinup brows are all about that beautiful, slightly arched shape that frames your eyes without taking over your face. Think Bettie Page’s elegant definition or Dita Von Teese’s timeless curves, strong yet feminine.
Start by brushing your brow hairs upward with a spoolie to see their natural shape. Using a brow pencil one shade lighter than your natural color, create small hair-like strokes along the bottom of your brow to define the arch. The highest point should sit just past your pupil when you’re looking straight ahead. Fill in any sparse areas with light, feathery strokes rather than harsh lines. Finish by brushing through again with your spoolie to blend and soften everything. Set with a clear or tinted brow gel to keep those beauties in place all day.
Step 3: Building Eye Dimension with Shadow
Start with a light, matte transition shade in the crease, soft taupe or warm brown works beautifully. Sweep it back and forth where your eye socket naturally indents, blending upward toward your brow bone. This creates subtle depth without competing with your liner.
Next, pat a slightly deeper shade into the outer corner, focusing on the outer third of your lid. Blend it gently into that crease color, creating a soft gradient. The goal isn’t dramatic smokiness, you want just enough definition to make your eyes pop once that wing goes on.
Keep the inner two-thirds of your lid relatively light. A champagne or vanilla shimmer catches light beautifully and keeps the look fresh rather than heavy. Skip this if you prefer an all-matte finish.
Feel adventurous? Swap that neutral palette for jewel tones, emerald, sapphire, or plum, on special occasions. The technique stays identical; only the colors change.
Step 4: Mastering the Iconic Winged Liner
The winged liner is the heart of pinup makeup, that bold, upward flick that frames your eyes with vintage glamour. Don’t worry if it feels intimidating at first; even the most seasoned pinup enthusiasts had to practice this one.
Start with a liquid or gel liner (gel gives you more working time). Begin at the outer corner of your upper lash line and draw a small flick upward, angling toward the end of your eyebrow. The length is up to you, start subtle and go bolder as you gain confidence. Next, draw a thin line along your upper lash line from the inner corner, gradually thickening it as you approach that outer flick. Connect the two, filling in any gaps.
If freehand feels shaky, try the tape trick: place a small piece of tape from your lower lash line angled toward your temple as a guide. Gel liner and an angled brush also offer more control than liquid pens when you’re learning.
Got uneven wings? We’ve all been there. Use a cotton swab dipped in makeup remover to clean up edges, or embrace the slight asymmetry, your face isn’t perfectly symmetrical anyway, and that human touch makes your look uniquely yours.
Step 5: Amplifying Your Lashes
Lashes are your secret weapon for that wide-eyed, doll-like pinup effect. You’ve got two paths here: false lashes or enhanced natural ones.
For falsies, strip lashes deliver instant drama. Measure them against your lash line and trim if needed, they should end just before your outer corner. Apply a thin layer of lash glue to the band, wait thirty seconds until tacky, then position them as close to your natural lash line as possible using tweezers or your fingers. Press gently to secure. Individual lashes give you more control if you prefer a custom look, especially at the outer corners.
Sticking with your natural lashes? Start with a good eyelash curler, hold for ten seconds at the base. Apply one coat of mascara, let it dry completely, then add a second coat focusing on the outer lashes. Wiggle the wand at the roots and sweep upward for maximum volume and length.
Step 6: Adding That Vintage Flush
With your eyes perfectly defined, it’s time to bring that fresh-faced glow to your cheeks. Pinup makeup celebrates a youthful, healthy flush that looks like you’ve just come in from a brisk walk, not overly contoured or sculpted.
Smile naturally to locate the apples of your cheeks, then apply your blush in gentle circular motions. For fair skin, peachy pinks and soft corals capture that vintage sweetness. Medium skin tones shine with rosy mauves and warm berries. Deeper complexions look stunning in rich plums and brick reds.
Cream blushes blend seamlessly for a dewy finish, while powders offer more staying power and work beautifully over powder foundation. Either formula works, choose what feels right for your skin type and the longevity you need.
The key is building color gradually. Start with less than you think you need, then add more. You’re aiming for a natural-looking flush that complements your bold lips without competing for attention.
Step 7: Perfecting the Statement Lip
Your lips are the crowning glory of any pinup look, the final touch that ties everything together and announces your confidence to the world. Start by lining your lips slightly outside their natural border to create that full, pouty shape the pinup icons perfected. Use short, feathery strokes rather than one continuous line, this gives you more control and a softer result. Fill in your entire lip with the liner to create a base that helps your lipstick grip and last.
Now comes the fun part: applying your vintage red lipstick or your chosen shade. Use a lip brush for precision, starting at the center of your upper lip and working outward to the corners, then repeat on the bottom. Blot with a tissue, dust a tiny bit of translucent powder over your lips through the tissue, then apply a second coat. This layering technique ensures your color stays put through conversations, meals, and that celebratory kiss you’ll want to give yourself in the mirror. Your statement lip isn’t just makeup, it’s your exclamation point.
How to Know You’ve Nailed the Look
Step back and take a good look at yourself in natural light, if possible. Your face should feel balanced and cohesive. The eyes are the focal point, but they shouldn’t overpower your lips or cheeks. If your winged liner seems too heavy compared to your lip color, you’ve likely found an imbalance. Similarly, if your blush dominates the look, dial it back slightly.
Check your symmetry by examining both sides of your face. Your brows should be sisters, not twins, minor differences are natural and charming. The wings of your eyeliner don’t need to match perfectly to the millimeter. If one side sits slightly higher or longer, it’s okay. The human eye is forgiving, especially when you’re moving and smiling.
Look for harsh lines that need blending. Run your finger gently along your jawline to ensure your foundation melds seamlessly with your neck. Soften any stark edges where your eyeshadow meets bare skin. Your blush should fade naturally, not stop abruptly.
Here’s the truth: you’ve nailed the look when you feel like the best version of yourself. That confidence radiates more than any technical perfection ever could. If you catch yourself smiling at your reflection, you’re there. The pinup aesthetic celebrates glamour, sure, but it’s rooted in self-assurance and joy. Trust your instincts. If something feels off, adjust it. If you feel fabulous, you are fabulous.
Taking Your Pinup Makeup Further
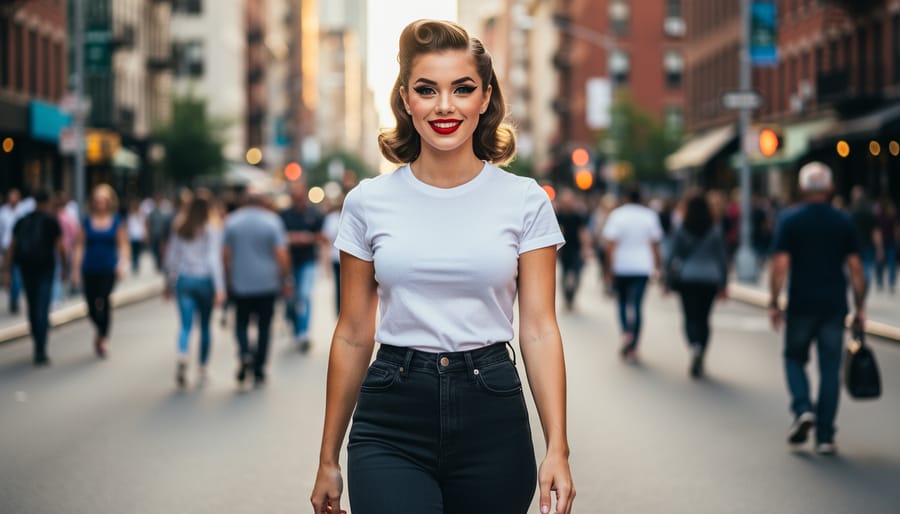
Once you’ve mastered the classic pinup makeup, the real fun begins. This iconic look is wonderfully versatile, you can adapt it to express your unique personality and suit any occasion.
Start by playing with color. While red lips are timeless, don’t hesitate to explore coral, berry, or even deeper burgundy shades. Swap classic brown eyeshadow for jewel tones like emerald or sapphire for evening events, or soften the entire look with peachy tones for daytime wear. The fundamental techniques remain the same; you’re simply adding your personal flair.
Consider pairing your makeup with complementary vintage hairstyles. Victory rolls, pin curls, and the classic bandana updo all enhance the pinup aesthetic beautifully. Even if you’re not ready to tackle elaborate hairstyles, a simple side-swept wave or high ponytail with a scarf can complete your transformation.
Connect with others who share your passion for this empowering style. Online communities celebrate pinup culture with tutorials, vintage style inspiration and supportive encouragement. Local vintage events, pinup contests, and rockabilly festivals offer wonderful opportunities to meet fellow enthusiasts and celebrate this inclusive community in person.
Remember, pinup makeup isn’t about rigid perfection, it’s about expressing confidence and embracing what makes you feel fabulous. Keep experimenting, stay creative, and let your inner vintage icon shine through every brushstroke.
How to Check Your Work
Step back from the mirror and look at your overall appearance rather than fixating on individual elements. Your pinup makeup should create a cohesive, balanced look where no single feature overwhelms the others. The eyes, brows, and lips should work together harmoniously, and your complexion should appear smooth and even from a few feet away.
Check your makeup in different lighting conditions. Natural daylight by a window reveals the most honest view, while softer indoor lighting shows how you’ll appear in most social settings. Take a photo with your phone, the camera often catches asymmetries or harsh lines that your eye might miss in the mirror.
A successful pinup look makes you feel confident and glamorous. If the makeup feels uncomfortable, too heavy, or doesn’t reflect your personality, it’s not working regardless of technical perfection. This style should enhance your natural beauty and boost your body confidence, not create a mask you’re hiding behind.
You won’t need professional help for pinup makeup, it’s designed to be achievable at home. However, if you’re preparing for a special event like a wedding or photoshoot and want absolute perfection, a makeup artist experienced in vintage styles can ensure flawless results and teach you techniques to refine your own skills.
Common Questions About Pinup Makeup
How long does pinup makeup take to apply?
For beginners, expect to spend 45 minutes to an hour creating the full look. As you practice the techniques, you’ll likely get your routine down to 20-30 minutes, making it completely manageable for special occasions or whenever you want to feel extra glamorous.
Can I wear pinup makeup every day?
Absolutely! Many people adapt pinup elements into their daily routine, whether that means a classic red lip for work or full vintage glam for everyday confidence. You can dial the drama up or down depending on your mood and setting.
How do I make my pinup makeup last all day?
Start with a quality primer, set your foundation with powder, use waterproof eyeliner for your wing, and finish with a setting spray. Blot your lips after the first application and reapply for staying power that lasts through meals and conversations.
Does pinup makeup work for all ages and skin tones?
Yes, pinup makeup celebrates beauty at every age and in every shade. The techniques adapt beautifully to different complexions, and the confidence it brings has no age limit, vintage glamour belongs to everyone who wants to embrace it.
Where can I find inspiration for my pinup looks?
Explore vintage films from the 1940s and 1950s, follow modern pinup artists on social media, browse vintage fashion magazines, and connect with local pinup communities. The Kitty Girl Vintage community offers ongoing inspiration that honors the timeless power of vintage beauty while celebrating individual expression.
Remember that pinup makeup is ultimately about feeling confident and beautiful in your own skin. Whether you choose a full vintage transformation or incorporate just one signature element like a bold lip or winged liner, you’re tapping into a tradition of self-expression that has empowered people for generations. Your interpretation is the right interpretation.
You’ve just learned a timeless art form that’s celebrated bold, beautiful women for generations. From Bettie Page’s sultry confidence to Dita Von Teese’s modern glamour, pinup makeup has always been about owning your look and feeling fabulous in your own skin.
The real magic isn’t in achieving magazine-perfect symmetry or following rules to the letter. It’s in that moment when you catch your reflection and think, “Wow, I look amazing.” That’s the transformation pinup makeup offers, and it’s available to everyone, regardless of age, size, or experience level.
Some days your winged liner will be flawless, and other days you’ll be wiping and redoing. That’s completely normal and part of the creative process. What matters is that you’re expressing yourself and having fun with it.
Remember, every pinup icon started somewhere. They practiced, experimented, and developed their signature looks over time. Your pinup journey is uniquely yours, and there’s no rush to perfect it overnight.
The Kitty Girl Vintage community celebrates vintage beauty in all its forms. Whether you rock full pinup makeup daily or save it for special occasions, you’re part of a vibrant tradition of women who refuse to dim their sparkle. Keep experimenting, stay confident, and let your inner pinup shine.